I have created a short demo to show you how easy it is to build a sample Web Application, create a docker container image with GitHub Actions and store your container image in GitHub Container Registry!
We are going to use GitHub Actions and have some automation in place! With GitHub Actions, we will make a workflow to Build And Publish Docker Images!
So what is a container again?? And what does it consist of?
A container is your program! It’s as simple as that. It’s a process that you will start-up somewhere on a computer. And that process is going to share the underlying OS and consume those resources.
You have one application inside a container. And the container is going to be the unit of work and also the unit of scaling.
Containers are ephemeral. The container image itself is read-only, and if you run it and delete it, the data that was in the container is going to be away.
By using containers, you can decouple the application and the state of the application. So you can serve them independently. In that way you can service your application a lot easier and role out new versions of your code.
Now is a perfect time to start building containers!
Step 1: Create a sample .NET 5 Web Application
First thing you have to know: I’m not a developer, so I only build sophisticated programs like hello world at scale in the cloud! To test out the capabilities of containers and GitHub Container Registry, I had to make a small program. There are a lot of hello world examples available on the interweb.
To get the understanding of building a container image, I found it helpful to write an app myself, and explain what steps are needed to build to container image.
What do you need to create the Web Application?
Some things are needed to create a .NET 5 Web Application.
.NET 5 SDK Click here to download .NET 5 SDK.
Yes, we need the SDK because we are going to create a web application from scratch. If you just want to run the .NET application, you can use the runtime.
Why .NET 5.0? Because it is the latest .NET version. .NET 5 has a nearly identical platform support matrix as .NET Core 3.1, for Windows, macOS, and Linux. If you are using .NET Core 3.1 on a supported operating system, you should be able to adopt .NET 5.0 on that same operating system version for the most part! From now on, use .NET 5 because it’s the new .NET Core version. Find more information on .NET here.
Docker
We also need Docker to create the container image and test the container. For that, download and install Docker
Git
Download and install Git, so you can have version control of your code.
Visual Studio Code
To edit the Web Application files and create the Docker file, we will use Visual Studio Code. If you use Visual Studio, you need Visual Studio 16.8 or later to use .NET 5.0.
For Visual Studio Code users on Windows or macOS, you need the latest version.
Download and install Visual Studio Code.
Creating a dotnet 5 (core) web application
Once you’ve installed all the prerequisites, it’s time to get started.
Create a new dotnet 5 webapp
You can check the version of .NET be using this command:
dotnet --info
First go to the directory where you want to create the Web Application. A new folder will be created for you.
From there, create a new webapp with following command:
dotnet new webApp -o myWebApp --no-https
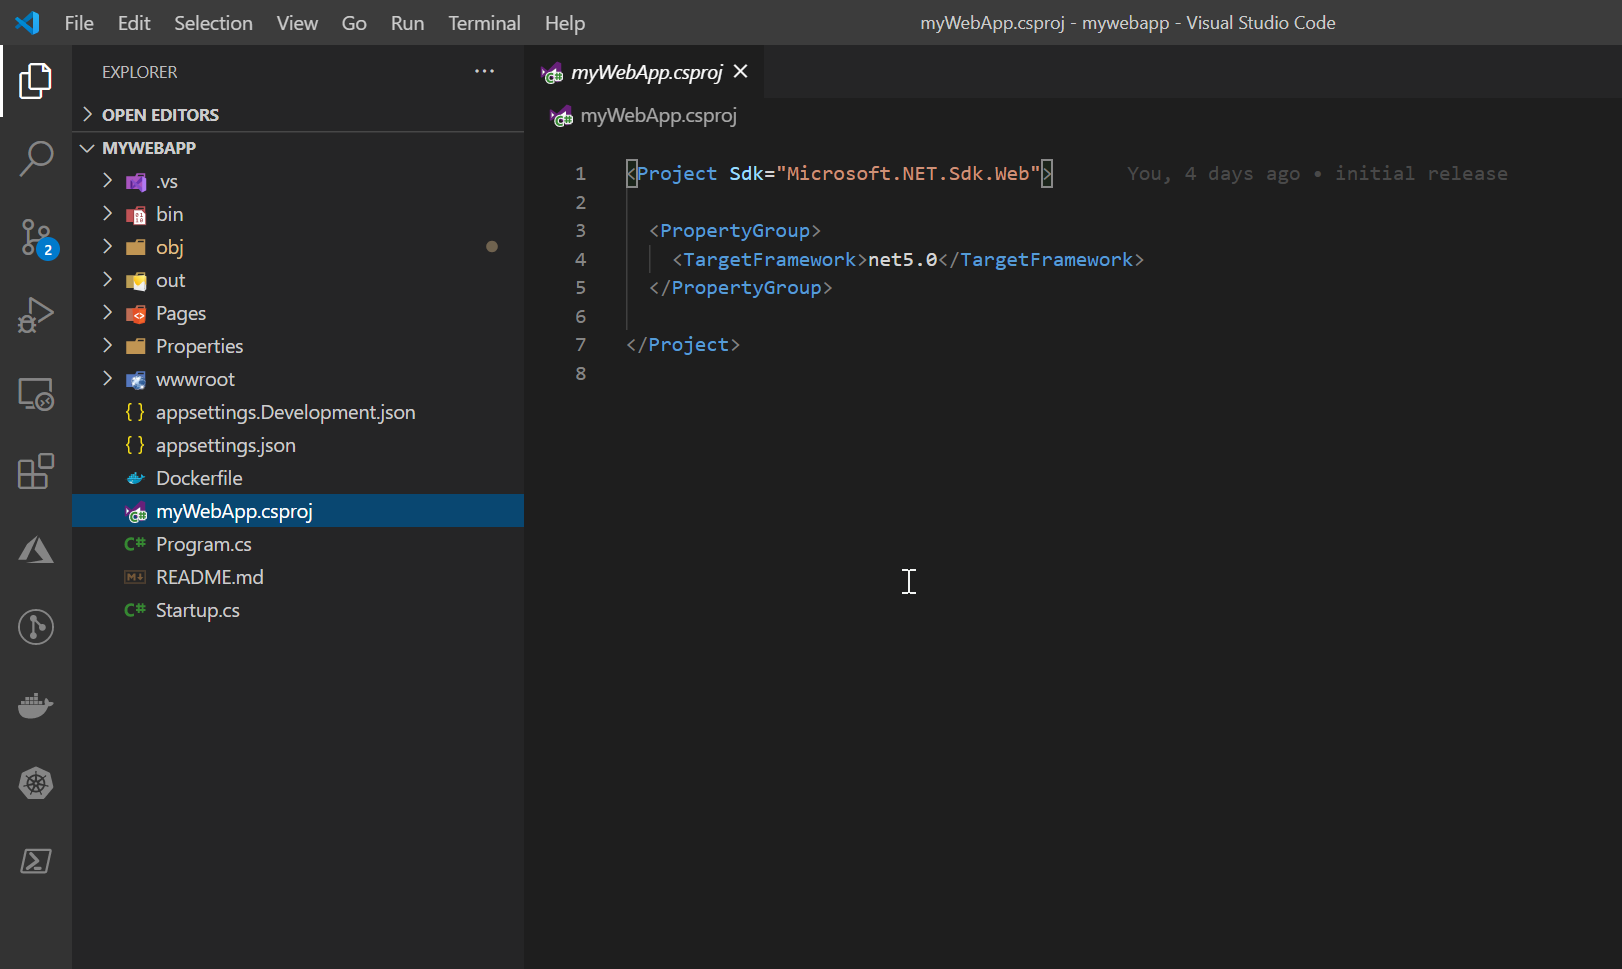
Now we have a default application in the current working directory. Check the files that have been created, so you can see the application structure.
If you want to adjust the default index.cshtml file, you can do that. Just adjust the index.cshtml page and add this:
<div class="text-center">
    <p>
      <strong>
        Running on Machine: @System.Environment.MachineName
      </strong>
    </p>
</div>
Test out the application locally, change the current directory to the directory of the application and run it by using this command:
cd ./myWebApp

dotnet run
Now you can have a look. Open a browser and go to: http://localhost:5000.
To stop your application, press ctrl+c
Compile the application for release
To get all the binaries in one place, and to make sure the application will work on another platform, we need to publish the application.
With this command, we are publishing the application and set the configuration to Release. You have two publish option, Debug and Release. We are going to specify an output parameter, so we have all published files in a directory called out.
Run this command and check the out directory:
dotnet publish -c Release -o out
Things you have to remember here:
- We’ve tested the application with dotnet run command.
- We’ve published the application with dotnet publish command.
With these steps, you could take the published files that are in the out (output) directory and run them on any other supported system.
Step 2: Build container image
The next step is that you build a container image.
The container image contains your code. That are the binaries, runtimes, environment variables, configuration, … Those files are going to be baked into the container image. And that is the thing that you are going to deploy!
If you want to store your container you can do it in a Container Registry. That’s where images live. Examples are Docker Hub, Azure Container Registry and GitHub Container Registry.
You can create a container image, by using a Dockerfile. A Dockerfile will define what the container consists of. It defines the container image and the Dockerfile tells you what the conatiner will look like when you build it.
This will be the process to create a container:
- Write Dockerfile (stuff that is in the container: application + any supporting binaries and libraries)
- Build the container, this will create a binary image and that is your container image of the application
- Push the container image into a container registry
- Other people who want to consume your container, have to Pull the container down to the system where they want to run it
- It’s the docker platform that will Run the container
Using docker build you can create an automated build that executes several command-line instructions.
Creating the Dockerfile
In the Dockerfile we first specify which layer it has to create, mostly from a known Docker image. In our case, we need the dotnet Docker image with the SDK installed. Because we need to publish to code inside our container. We use the container image from the MCR, which is the Microsoft Container Registry. We can pull the container image named sdk from the registry named dotnet that is hosted at the Microsoft Container Registry. We can also use a specific version (a TAG).
FROM mcr.microsoft.com/dotnet/sdk:5.0 AS build-env
WORKDIR /app
Copy the application into the container we are going to build.
# Copy all csproj files and restore as distinct layers
COPY *.csproj ./
RUN dotnet restore
Copy the application files and publish the application with the RUN dotnet pubish command, like we did in previous examples. We have defined an output folder called :out.
# Copy everything else and build
COPY . ./
RUN dotnet publish -c Release -o out
Once we have published our code, and have the binaires that we can run, we are going to specify the runtime environment.
Here we are defining the runtime image, set the current work directory to /app and copy the file from the build environment in the first step from that /APP/OUT directory to our current work directory /app.
We also define an ENTRYPOINT, where the application has to start.
# Build runtime image
FROM mcr.microsoft.com/dotnet/aspnet:5.0
WORKDIR /app
COPY --from=build-env /app/out .
ENTRYPOINT ["dotnet", "/app/myWebApp.dll"]
We will expose the container on port 80.
EXPOSE 80
So the complete Dockerfile will ook like this:
FROM mcr.microsoft.com/dotnet/sdk:5.0 AS build-env
WORKDIR /app

# Copy all csproj files and restore as distinct layers
COPY *.csproj ./
RUN dotnet restore

# Copy everything else and build
COPY . ./
RUN dotnet publish -c Release -o out

# Build runtime image
FROM mcr.microsoft.com/dotnet/aspnet:5.0
WORKDIR /app
COPY --from=build-env /app/out .
ENTRYPOINT ["dotnet", "/app/myWebApp.dll"]

EXPOSE 80
Building the container
Now we just have to build the container locally.
With this command, we create the container image, give it a TAG named: mywebappimage, we give it a version: v1 and specify the local folder where the Dockerfile is with the . specification.
docker build -t mywebappimage:v1 .
Now you can have a look and check out the local images on your system:
docker images ls
If you want to test and run your container, you can use the docker run command:
docker run --name mywebapp --publish 8080:80 -detach mywebappimage:v1
Now we have build the image locally, and that will be it for the first part.
If you want to cleanup your local system, run these commands:
docker stop mywebapp
Step 3: Enable GitHub Container Registry
To store our Docker container images, we are going to use GitHub Container Registry.
INFO: The GitHub Packages Docker registry will be superseded by GitHub Container Registry!
GitHub Packages Docker registry: docker.pkg.github.com/OWNER/REPOSITORY/IMAGE_NAME
GitHub Container Registry: ghcr.io/OWNER/IMAGE_NAME
You can use GitHub Container Registry to seamlessly host and manage Docker container images in your organization or personal user account on GitHub. GitHub Container Registry allows you to configure who can manage and access packages using fine-grained permissions.
If you upload your container image to a registry, you want to be sure that it stays exactly the same and don’t get changed.
The container registry is secured by:
- Transport - HTTPS
- Image digests: hash of an image, to make sure the image is not changed
A container registry is a key component of building a CI/CD pipeline!
The GitHub Container Registry hosts containers at ghcr.io/OWNER/IMAGE-NAME.
GitHub Container Registry
GitHub Container Registry is currently in public beta and subject to change. During the beta, storage and bandwidth are free. To use GitHub Container Registry, you must enable the feature for your account.
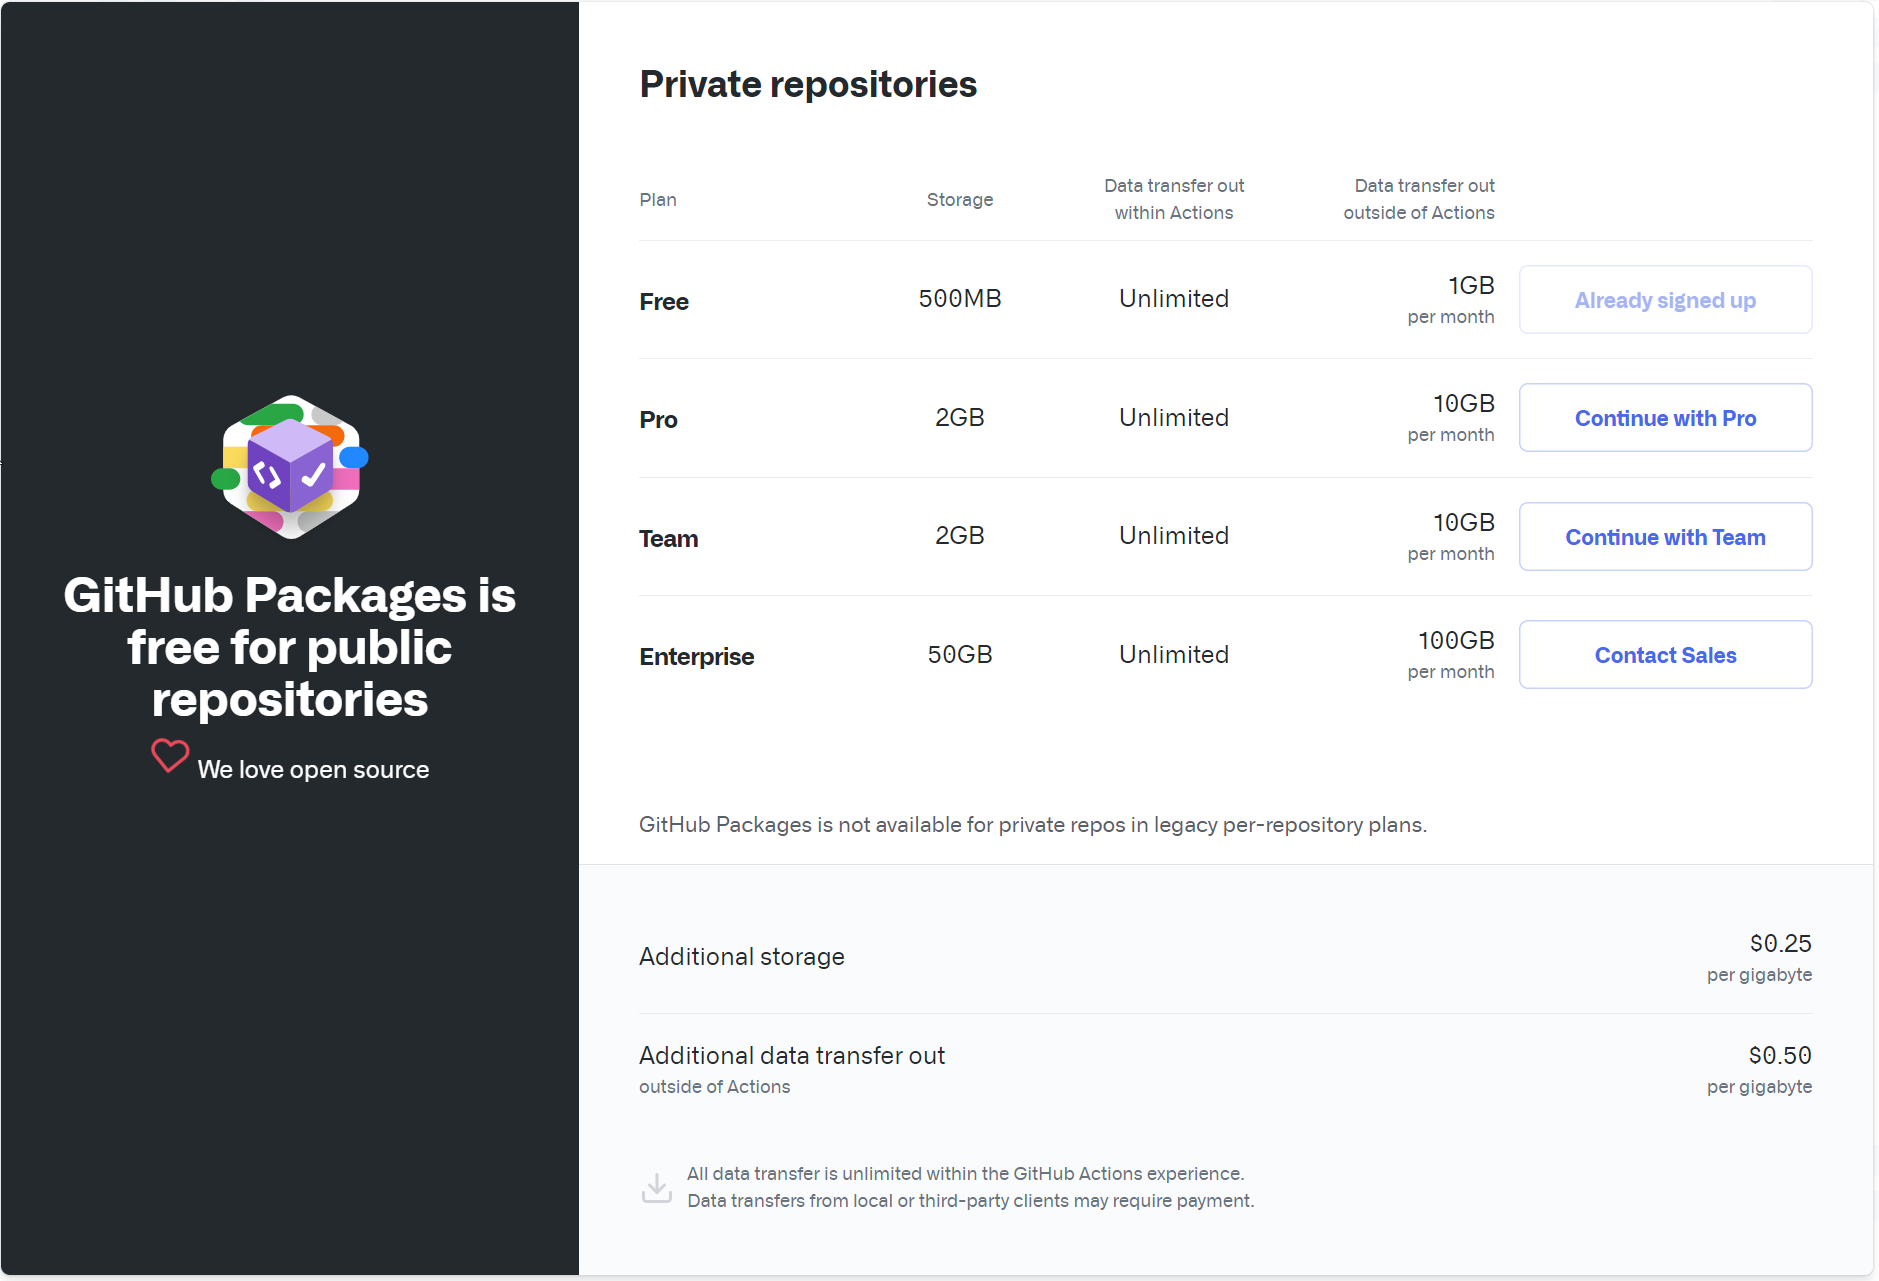
GitHub Container Registry is free for public repositories!
Enable GitHub Container Registry for your account
More info on GitHub Container Registry
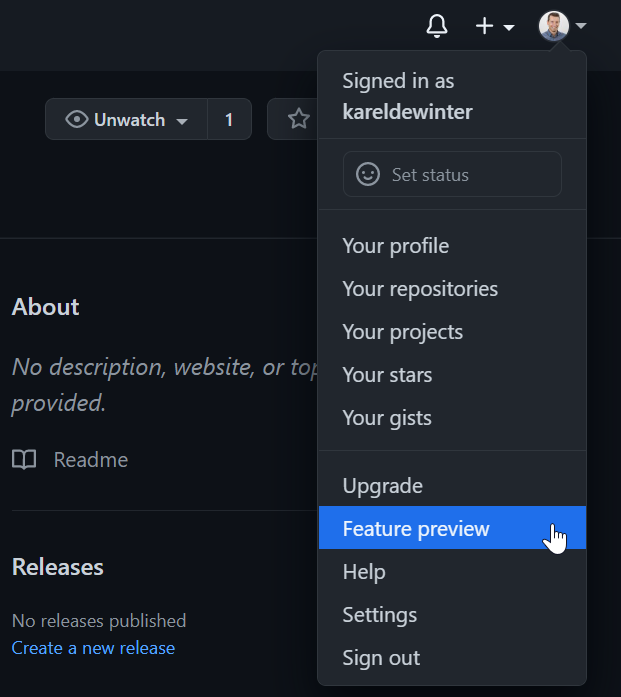
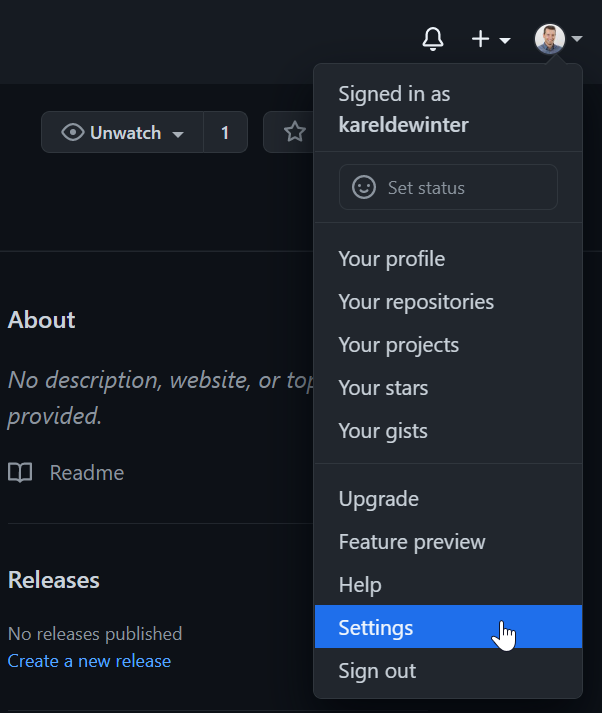
On GitHub, navigate to the main page of your user account. In the top right corner of GitHub, click your profile photo, then click Feature preview:
On the left, select “Improved container support”, then click Enable:
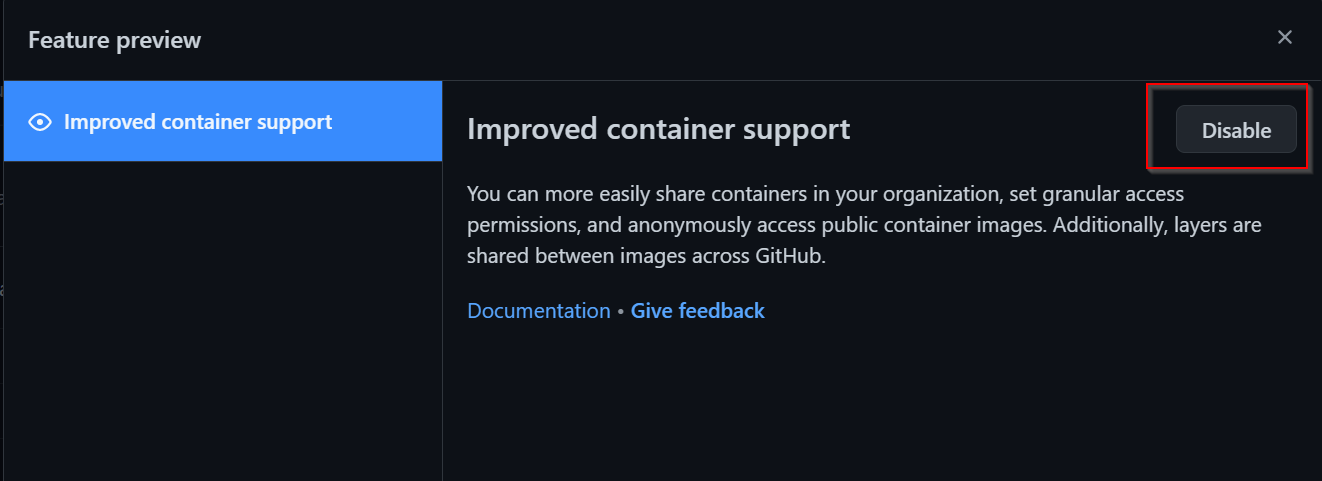
In my GitHub environment, the preview feature is already enabled, that’s why you only see the disable button.
Creating a personal access token
Once you enabled your GitHub Container Registry, you need to create a Personal access token (PAT) for the GitHub Actions Workflows to be able to push the Docker container image to the registry.
Personal access tokens (PATs) are an alternative to using passwords for authentication to GitHub.
The Personal Access Token must have enough permissions to authenticate to the GitHub Container Registry.
GitHub manual for creating a Personal Access Token
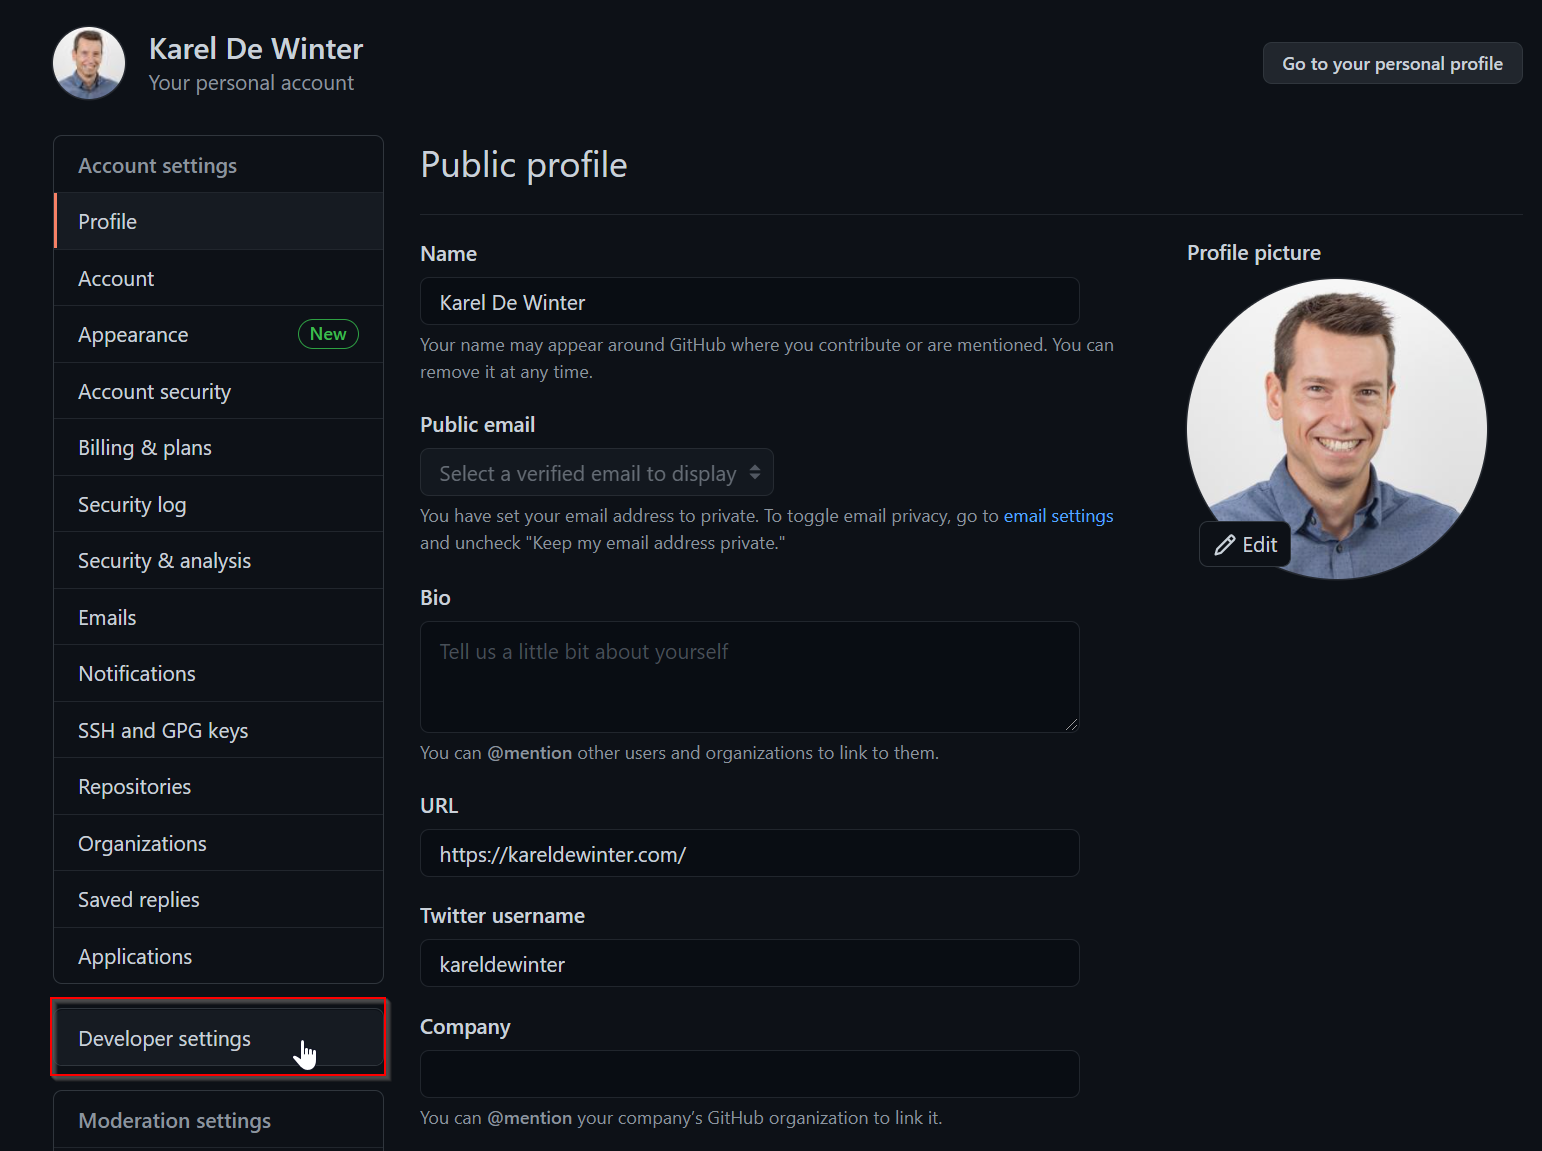
In the upper-right corner of any page, click your profile photo, then click Settings:
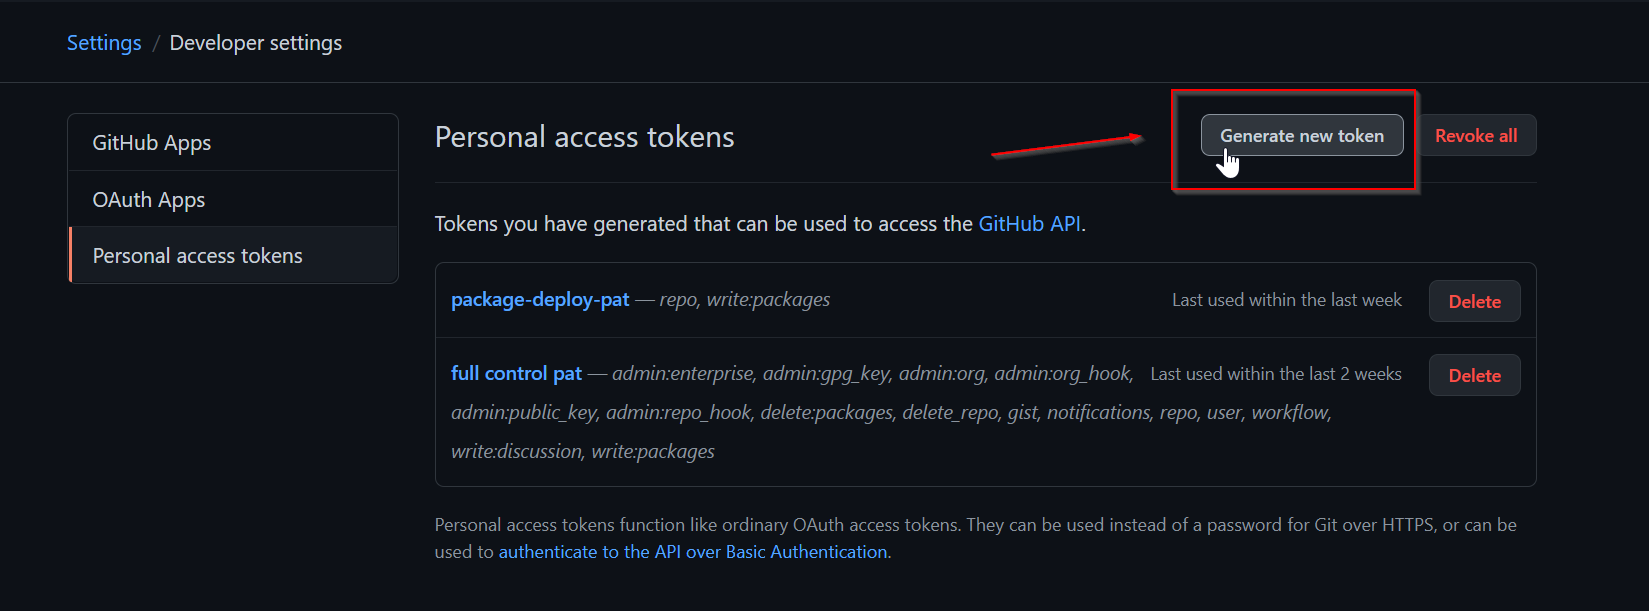
In the left sidebar, click Developer settings and click on Personal access tokens:
Click Generate new token:
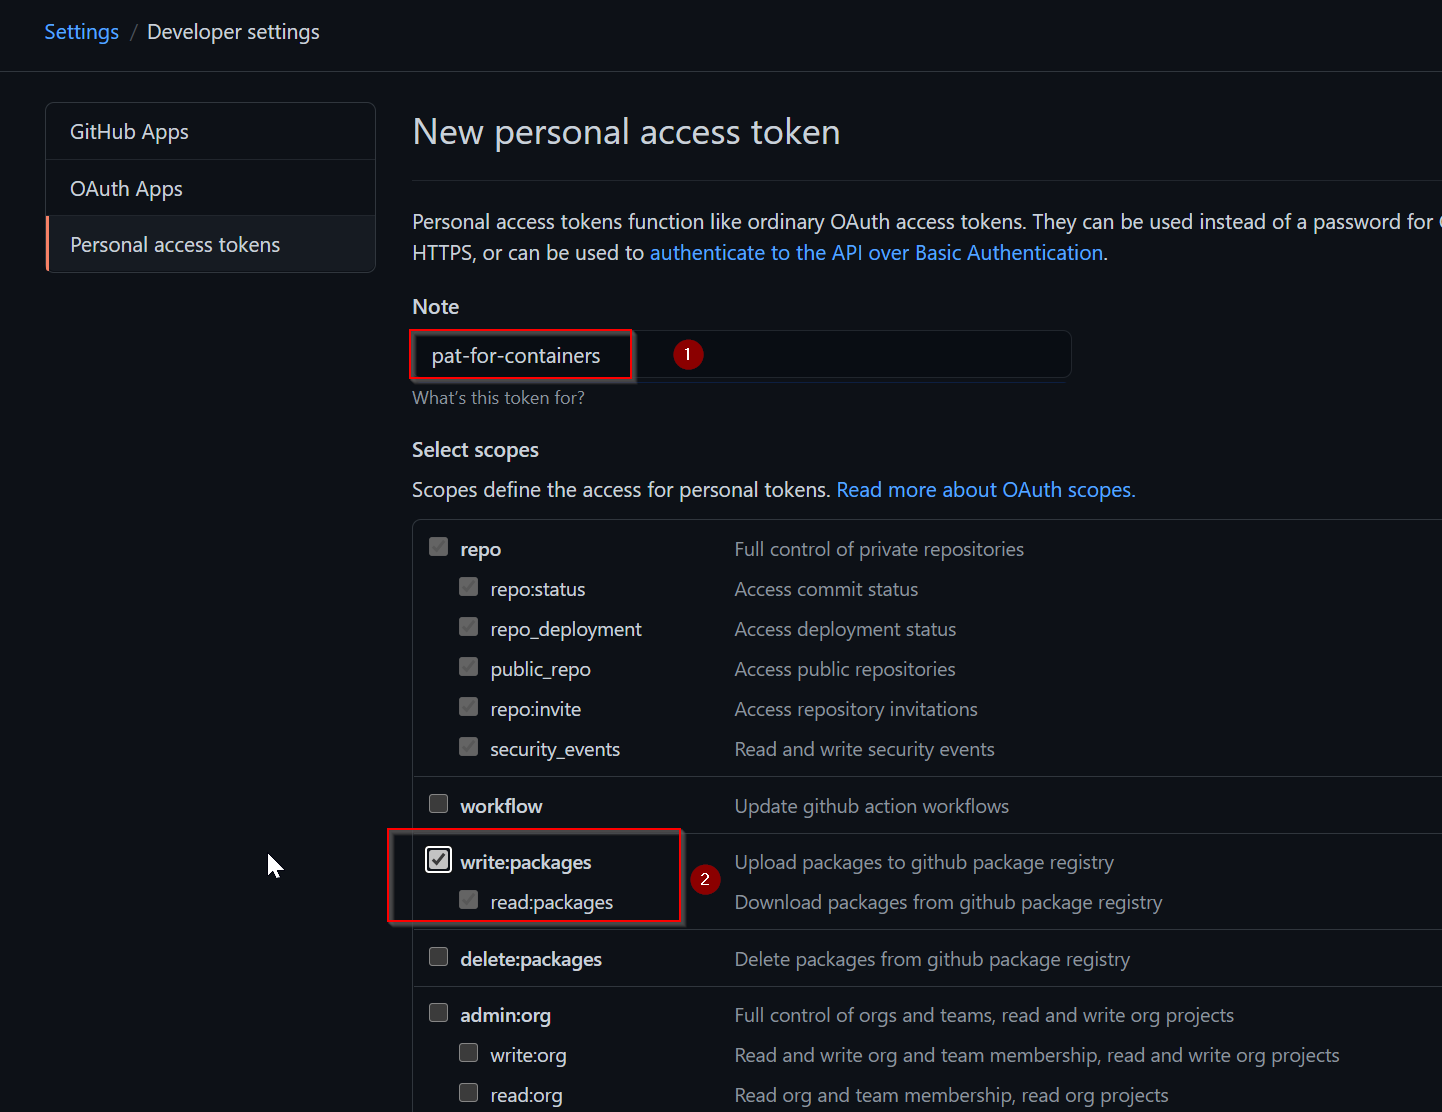
Give your token a descriptive name and select the scopes, or permissions, you’d like to grant this token.
Click Generate token:
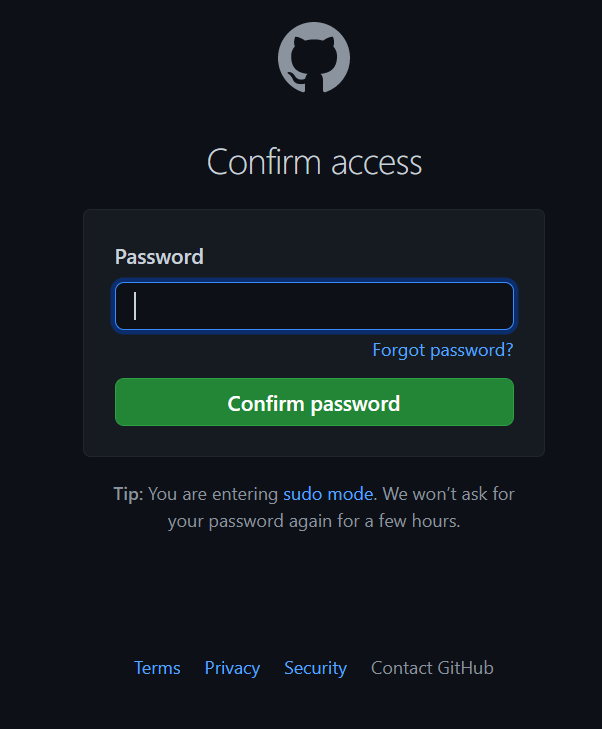
When asked for Password, fill in GitHub password:
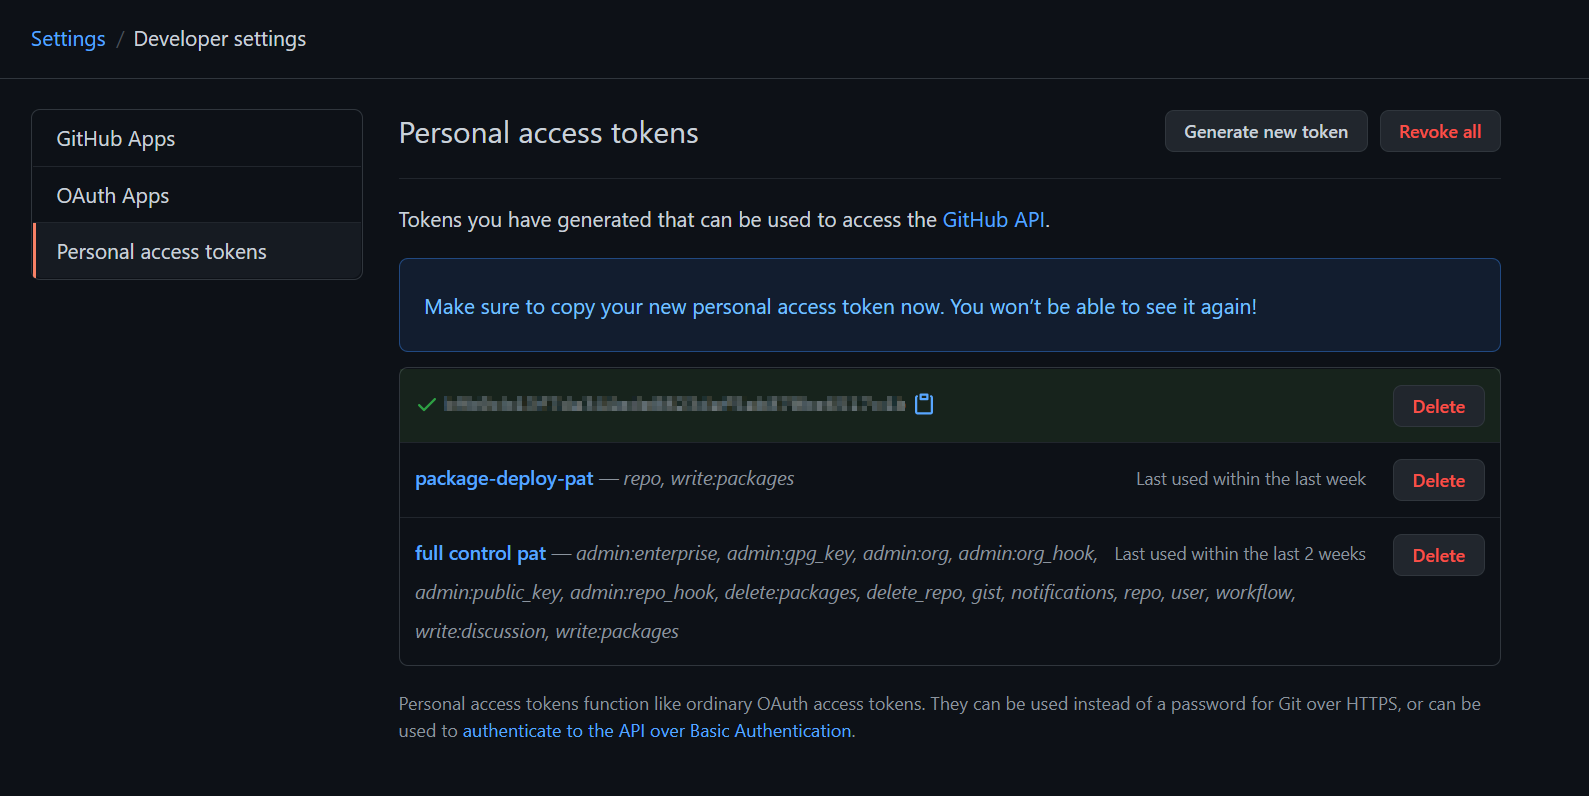
Copy the token to your clipboard. For security reasons, after you navigate off the page, you will not be able to see the token again!! Save the token in your password vault or paste it in Notepad.
Generating Repository Secrets
To use the PAT in your Workflow, you can specify secrets in your repository. In that way, you don’t have store clear text passwords into your code files.
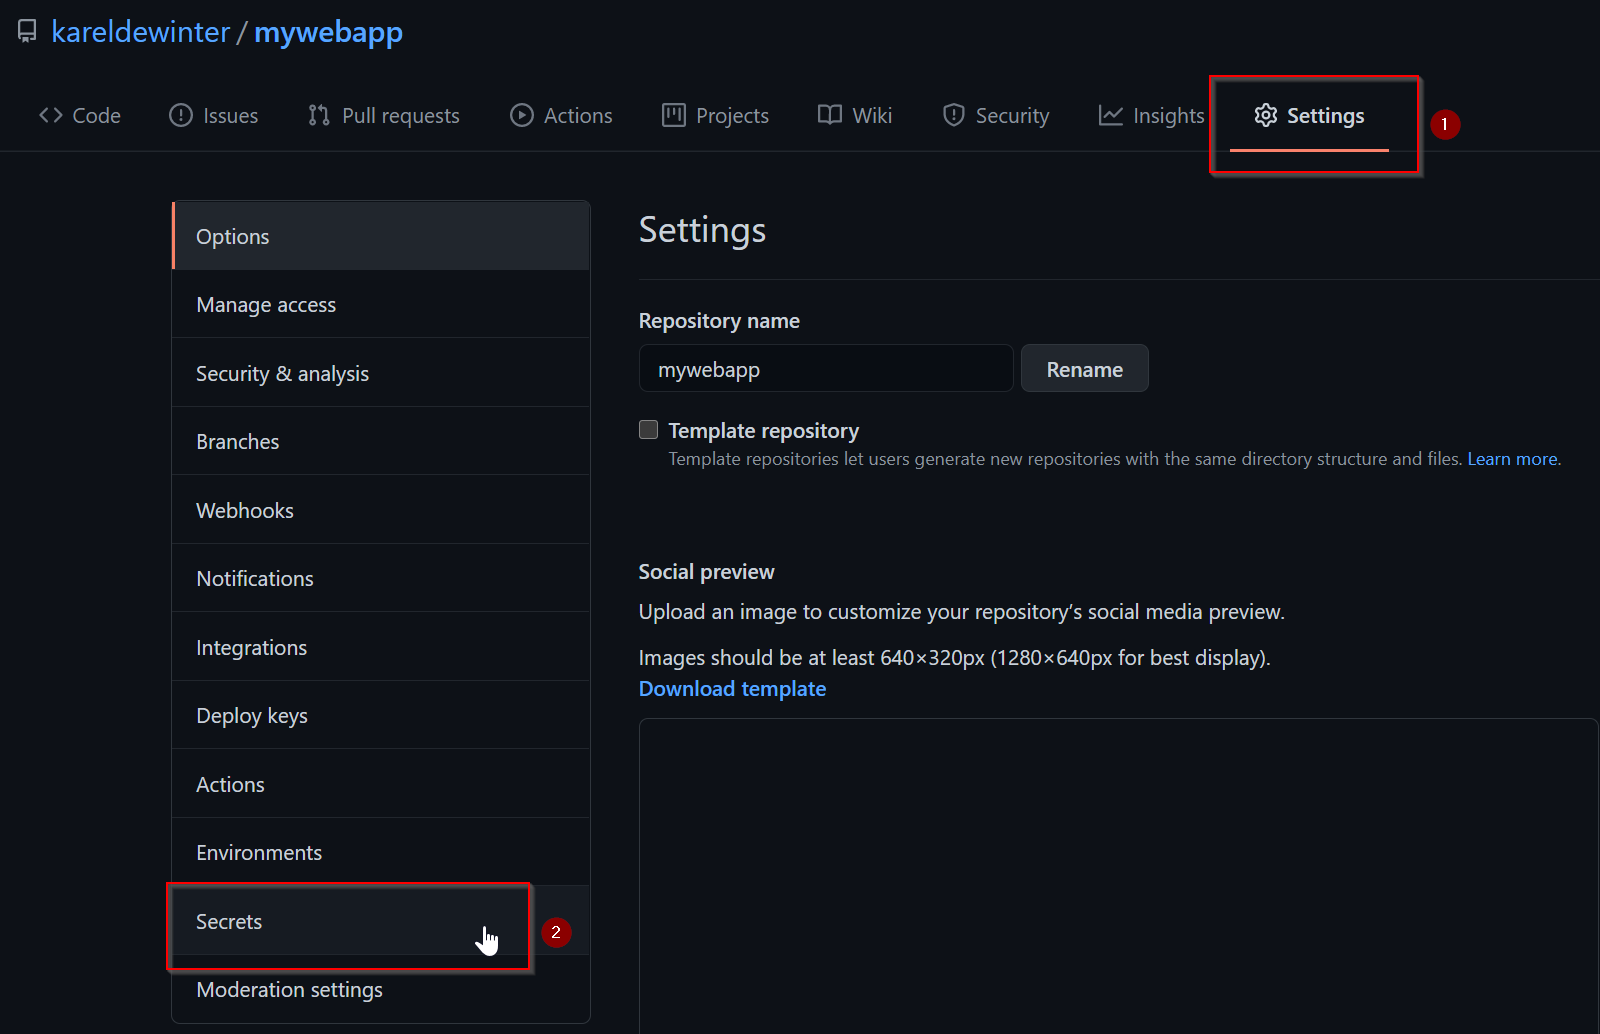
To enable repository secrets, go to your Repository Settings and Secrets Tab:
Click on New Repository Secret:

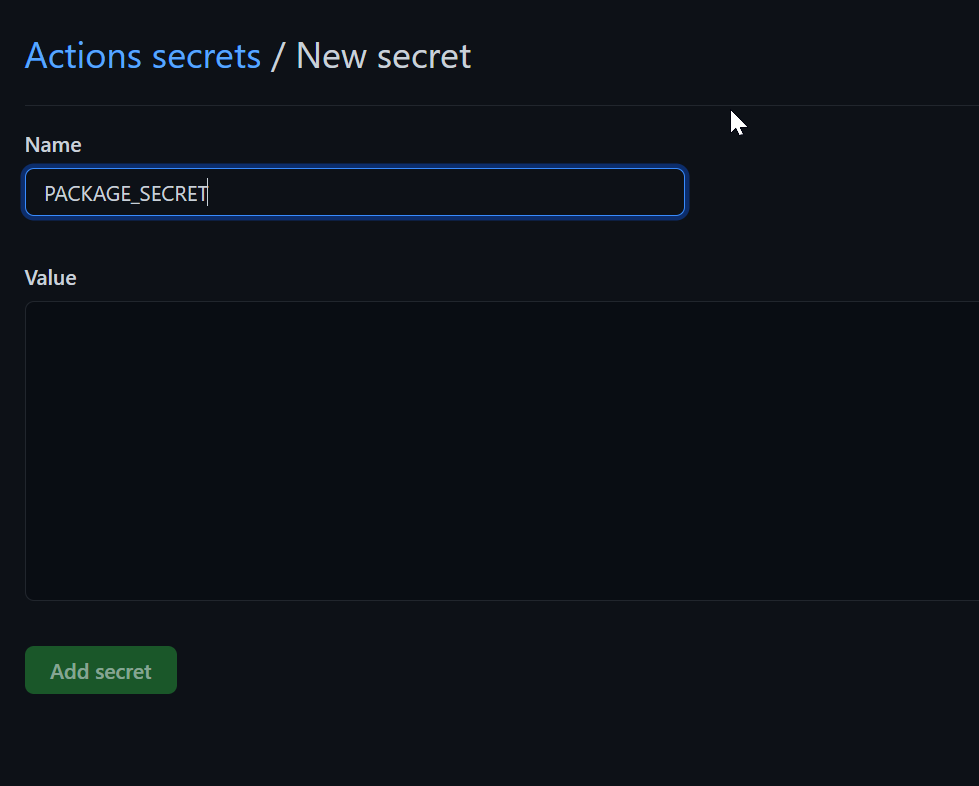
Click on Add Secret, to store the secrets in your repository.
Step 4: Build and Push the Docker Container Image
Now we are going to automate our developer workflow with GitHub Actions!!
GitHub Actions => automate the developer workflow.
What are GitHub Actions
GitHub Actions help you automate tasks within your software development life cycle. GitHub Actions are event-driven, meaning that you can run a series of commands after a specified event has occurred. For example, every time someone creates a pull request for a repository, you can automatically run a command that executes a software testing script.
Advantages:
- Multiple CI/Build Servers: Integrate your code across Linux, Windows and MacOS operating systems.
- Test Multiple Versions
- Trigger on any GitHub Event: Kick off the build process when code is pushed to a branch, a pull request is merged, when a check run has been requested, when someone creates a branch, … and many more.
During this Integrations Process, GitHub Actions accepts certain parameters. Those are instructions for the CI Server to do. Those instructions are in the form of a workflow.
The workflow file is located in this location in your repository:
.github/workflows/
When you place a .yml file in that location (for example ci.yml)
This file can provide the CI Server with instructions how to build your application.
Within that workflow file, we have to define a series of steps to do something. A step can refer to an action.
We can use other GitHub actions and refer it into our steps. Think of actions as a function, that you can re-use in your code.
Creating GitHub Actions
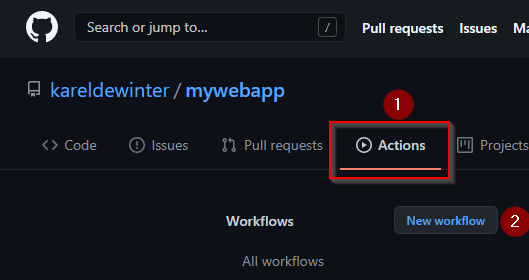
Go to your repository and click on the Actions tab.
You will see some suggestions on how to get started with Actions. These are starter workflows and are a very good starting point.
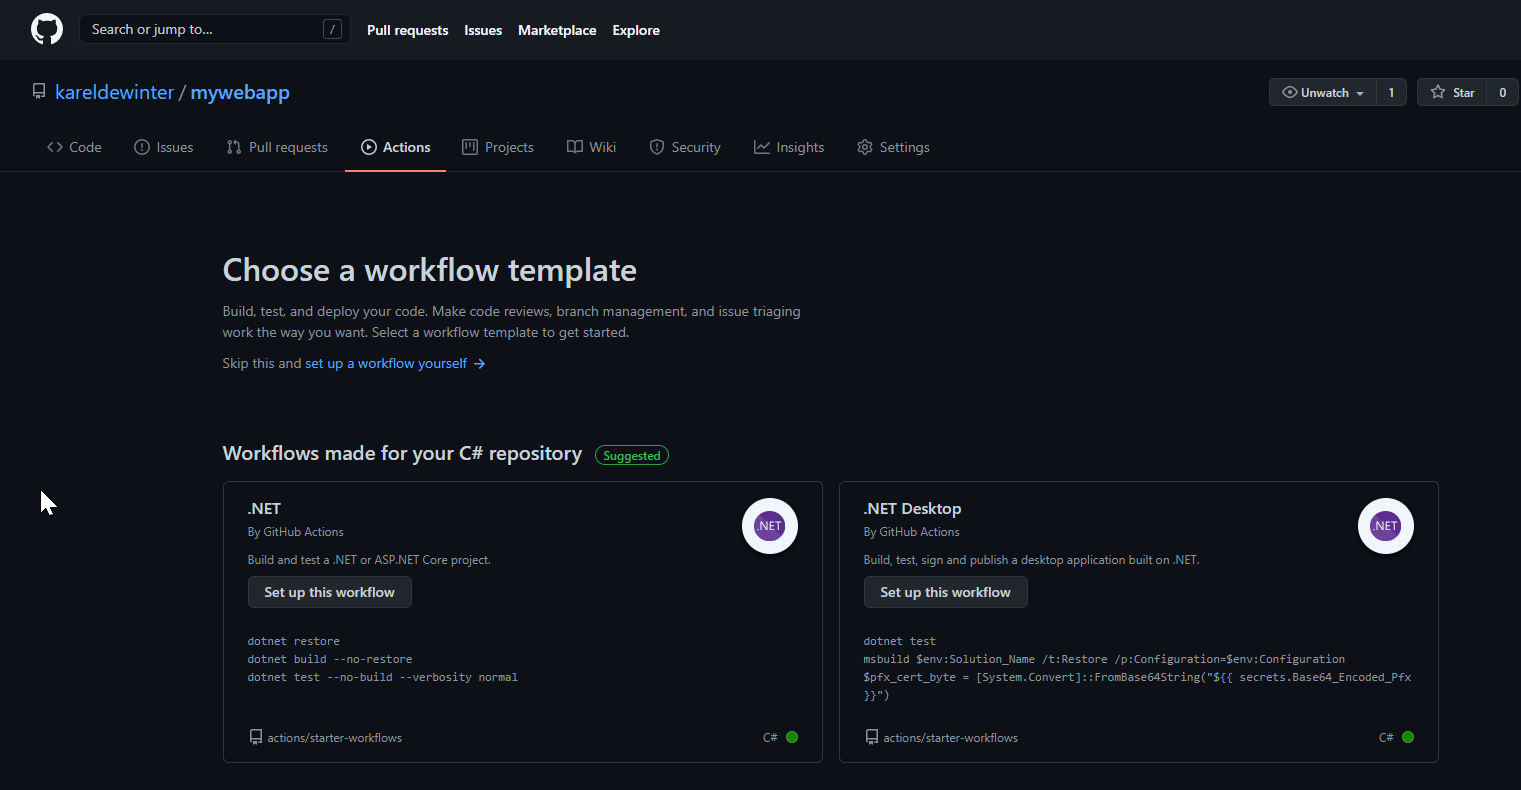
We are going to create a blank workflow:

Re-name the main.yml file to: Build And Publish Docker Image.yml
Our workflow is based on the official Build and push docker images from the GitHub marketplace: Check out the marketplace here of you want to learn more.
Copy paste this workflow file into the blank file you just created. You can find details about the different steps in the comments:
# This is a basic workflow to help you get started with Actions

# Define a name of the workflow
name: Build and Publish Docker Image

# This controls when the action will run.
on:
  # Triggers the workflow on push or pull request events but only for the main branch
  push:
    branches: [ main ]
  pull_request:
    branches: [ main ]

  # Allows you to run this workflow manually from the Actions tab
  workflow_dispatch:

# A workflow run is made up of one or more jobs that can run sequentially or in parallel
jobs:
  # This workflow contains a single job called "build"
  build:
    # The type of runner that the job will run on
    runs-on: ubuntu-latest

    # Steps represent a sequence of tasks that will be executed as part of the job
    steps:
      # Checks-out your repository under $GITHUB_WORKSPACE, so your job can access it
      - uses: actions/checkout@v2

      # Login to your repository under
      - name: Login to GitHub Container Registry
        uses: docker/login-action@v1
        with:
          registry: ghcr.io
          username: $
          password: $

      # Build and push container
      - name: Build and push
        uses: docker/build-push-action@v2
        with:
          context: .
          file: ./Dockerfile
          push: true
          tags: |
            ghcr.io/kareldewinter/mywebappimage:latest
            ghcr.io/kareldewinter/mywebappimage:v0.1
Other examples you could use in a workflow file
Tag your Docker image with your desired image name and hosting destination.
$ docker tag IMAGE_NAME ghcr.io/OWNER/NEW_IMAGE_NAME:TAG
If you don’t want to use the docker/login-action@v1 action, you can Authenticate to GitHub Container Registry manually.
$ echo $CR_PAT | docker login ghcr.io -u USERNAME --password-stdin
> Login Succeeded
If you don’t want to use the docker/build-push-action@v2 action, you can use this manual step:
Push your container image to GitHub Container Registry
$ docker push ghcr.io/OWNER/IMAGE-NAME:TAG
How to test the workflow
From your repositories Actions tab, find the Build And Publish Docker Image workflow and click on Run workflow button. This will manually trigger the workflow.
Check your container image
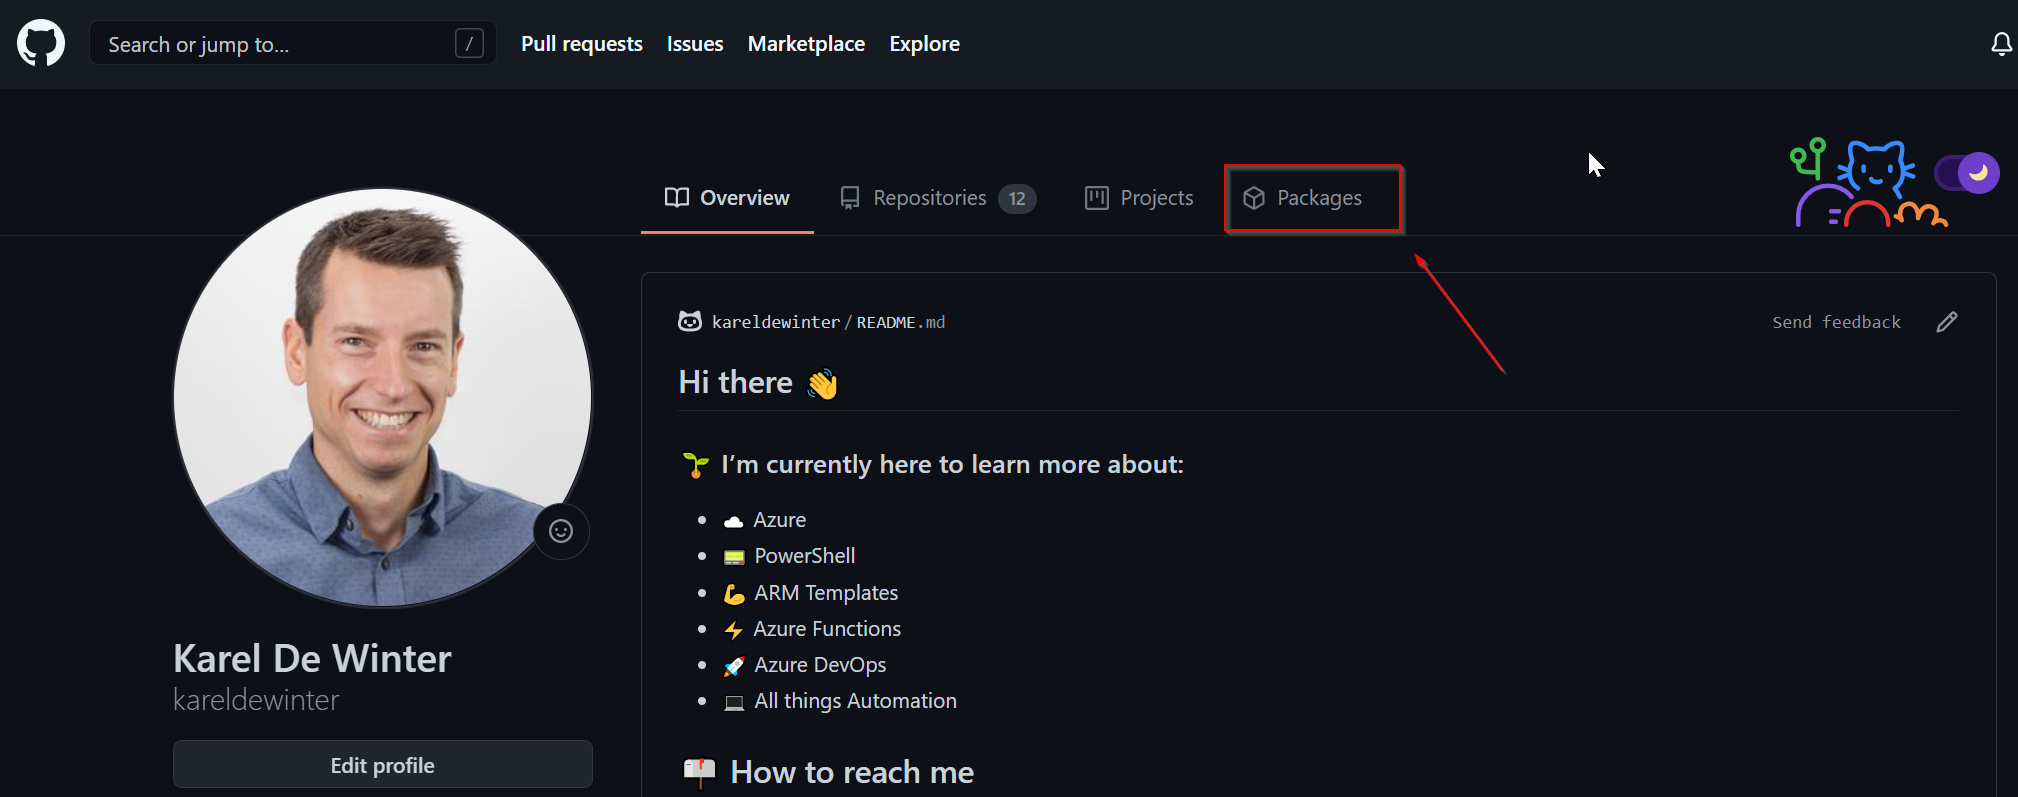
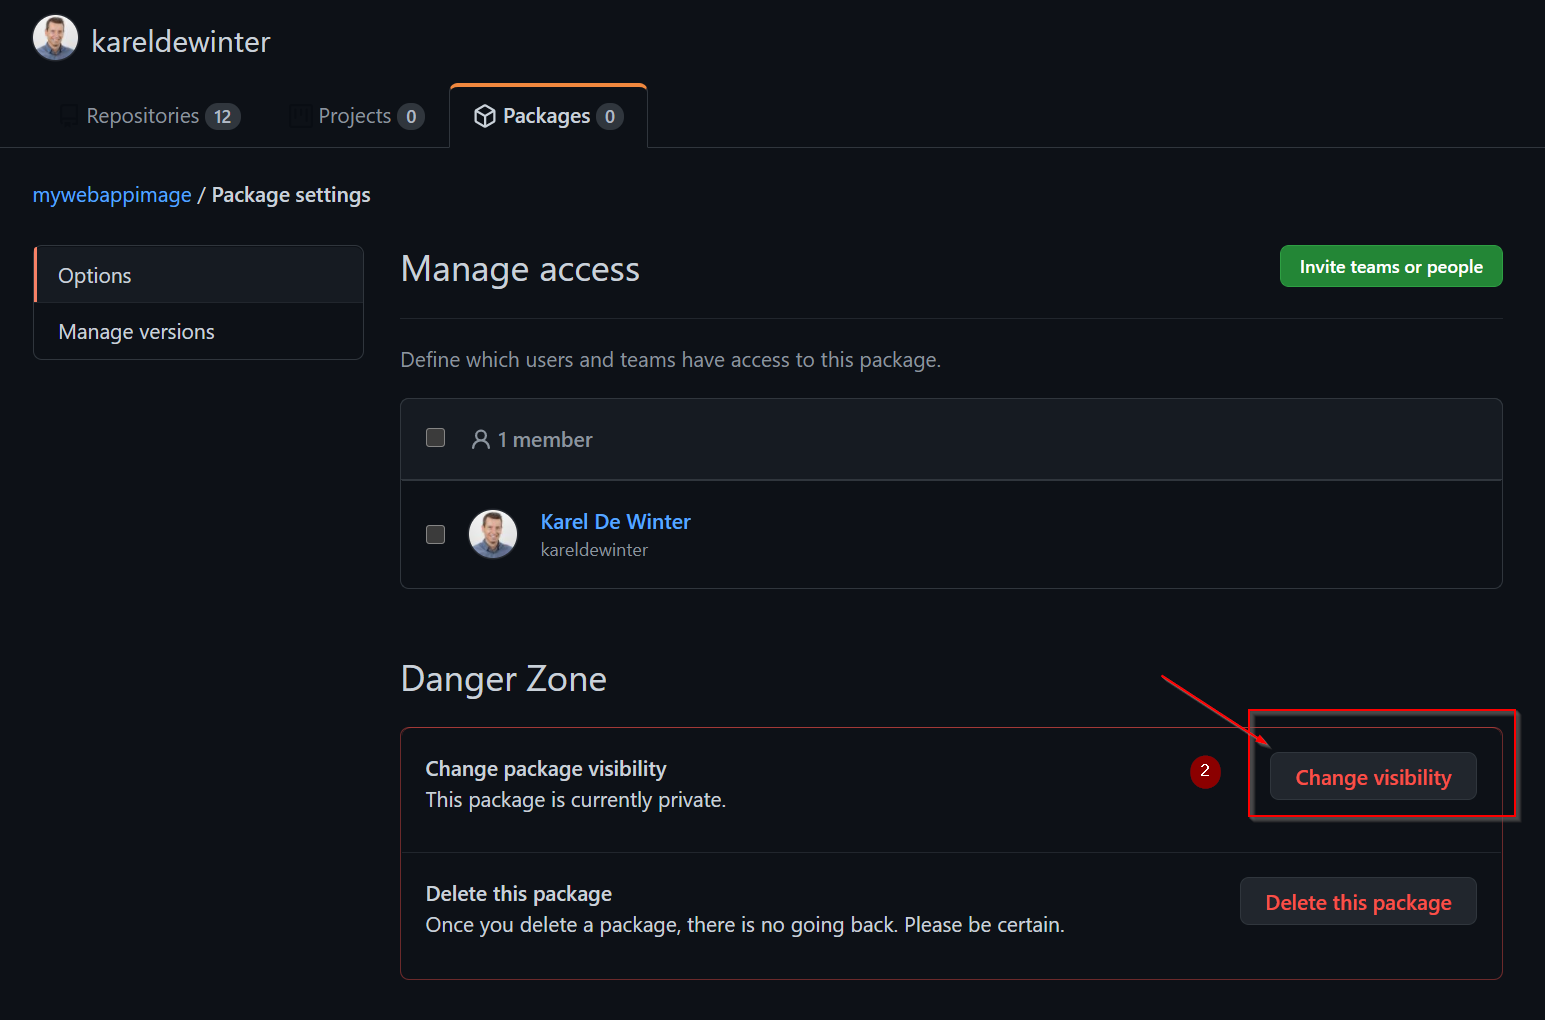
If you want to check which container image the GitHub Workflow has created, you can check it out at your profile and go to packages:
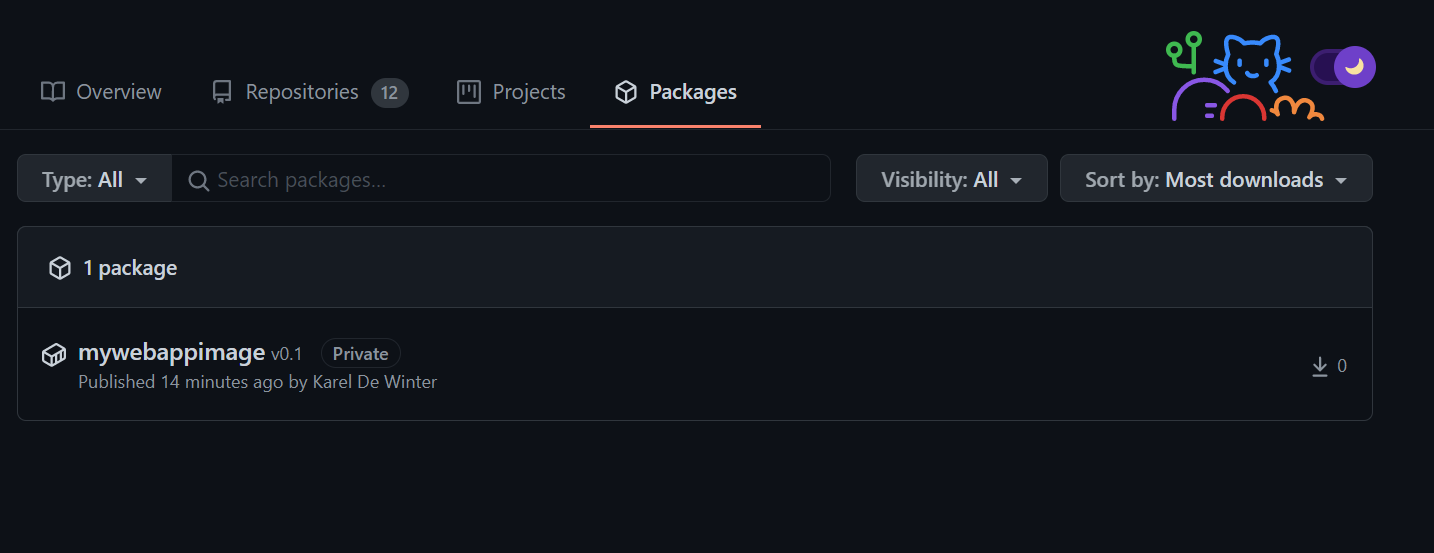
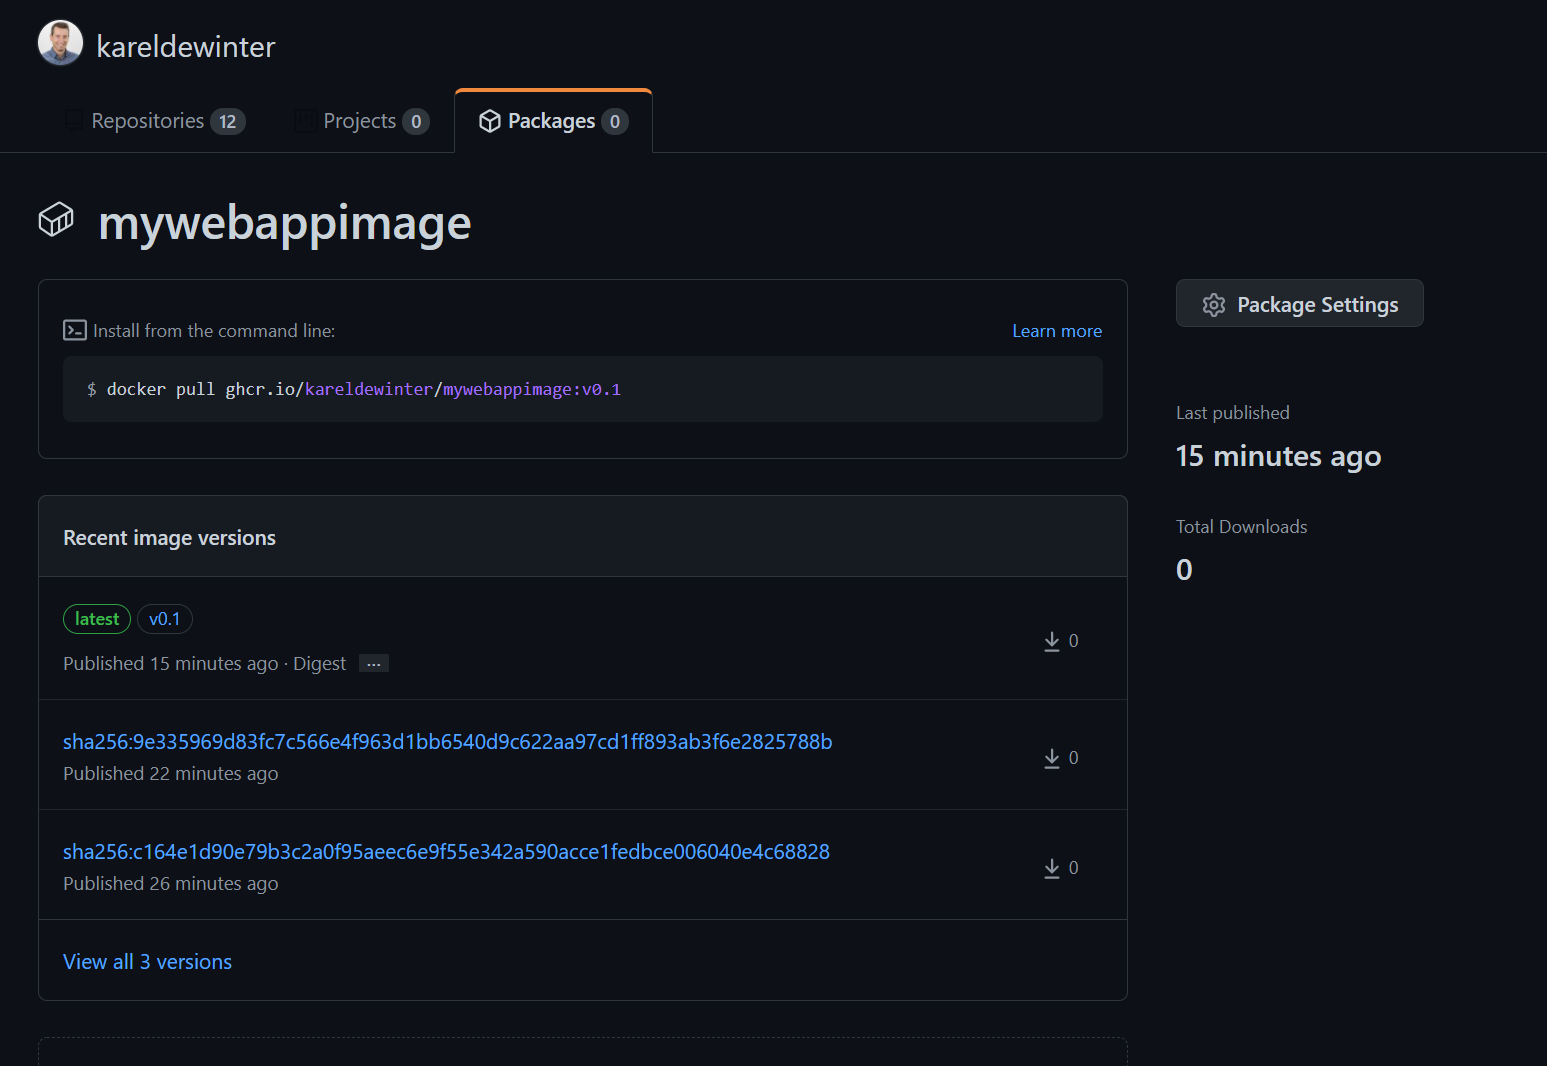
Voila! Job well done! If you want, you can make your image Public and use it to mount in Azure Web App for containers, for example.
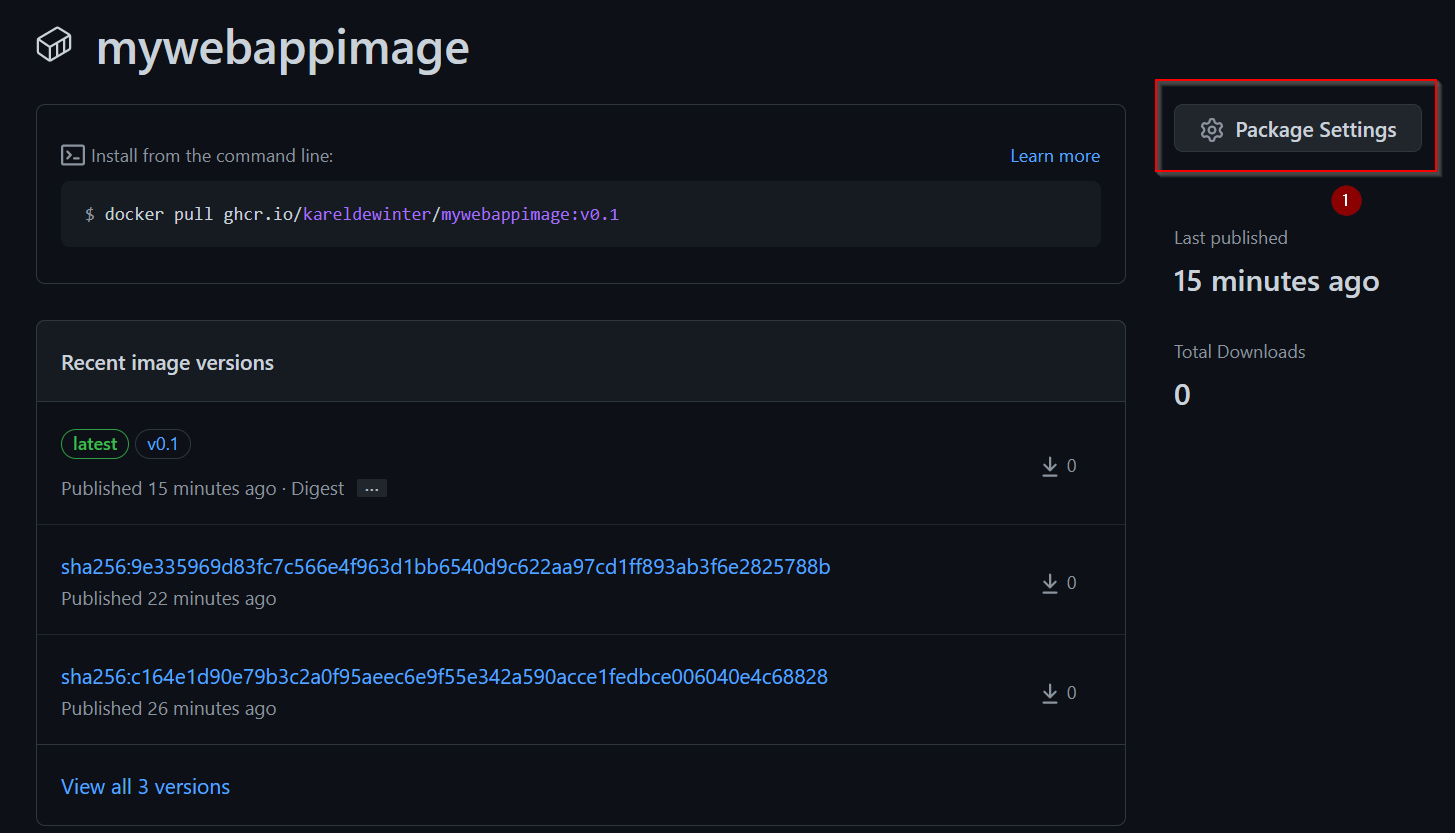
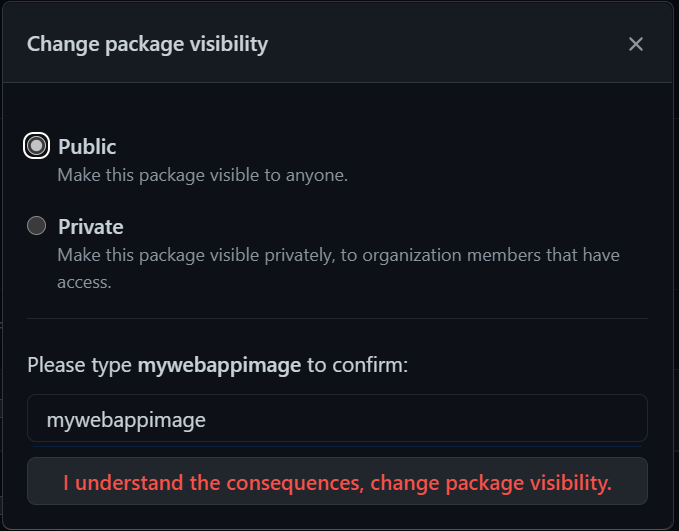
If you want to make you image public, click on package settings:
That will be for a next blogpost!
Things to keep in mind
Some Docker instructions interact with GitHub Actions, and an action’s metadata file can override some Docker instructions. Ensure that you are familiar with how your Dockerfile interacts with GitHub Actions to prevent any unexpected behavior. Read here for the Dockerfile support for GitHub Actions
GitHub sets the working directory path in the GITHUB_WORKSPACE environment variable. It’s recommended to not use the WORKDIR instruction in your Dockerfile.
If you define entrypoint in an action’s metadata file, it will override the ENTRYPOINT defined in the Dockerfile.
If you have a GitHub Actions workflow that uses a Docker image from the old GitHub Packages Docker registry, you may want to update your workflow to the container registry. Check out this article if you want to learn more: Updating your GitHub Actions workflow
Conclusion
GitHub Actions are very powerful and they come with a lot of actions out of the box. They allow you to have a CI/CD workflow for your application, even for building containers.
With GitHub Container Registry, GitHub is offering a new way to store your container images online.
Hopefully you have learned something new, and are going to use GitHub Actions to build your container image and store them in GitHub Container Registry!